PROCESSING


During the first year of Creative Computing course I had to make a lot of small apps using Processing.

Some of the early examples are:
- vibrating circles
- letters with rectangles filling them in
- painting vector shape
- image tint

SOUNDALA:

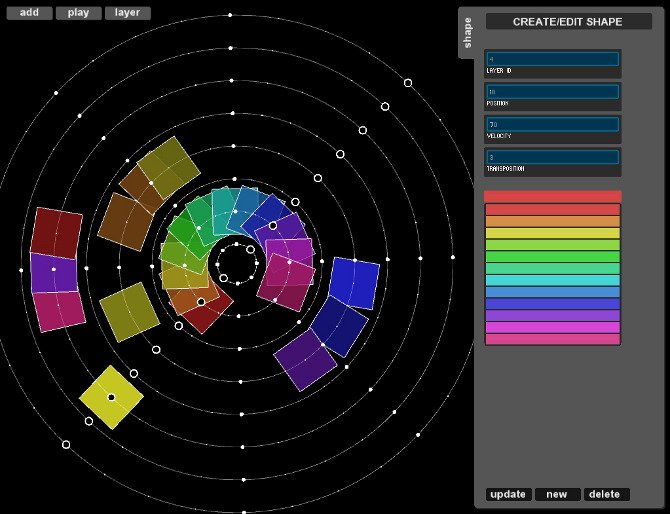
Soundala was a group project that span throughout the whole first year of my studies. Soundala is an audiovisual sequencer. The Idea of Soundala originated from the symetry and the recurring patterns in Mandalas. The visual representation of sound samples as concentric pattern was inspired by modernised mandalas by Gunnar Gislason:


Our idea was to make music creation not only visually intuitive but beautiful as well. In order to do that we thought of a basic backbone structure of the mandala which was put into code. Then my solo part was to design and build the GUI. This was hard because I had to work hand in hand with the code development team and understand everything they are doing in order to make Soundala's user interface. I also tried to make it aesthetically nice looking but simple so not to distract the user from the Soundala itself. I did the coding in Processing. This project is still not finished though because we thought so many extensions for Soundala that even the whole summer of coding wouldn't cover it.

video of Soundala still in it's development
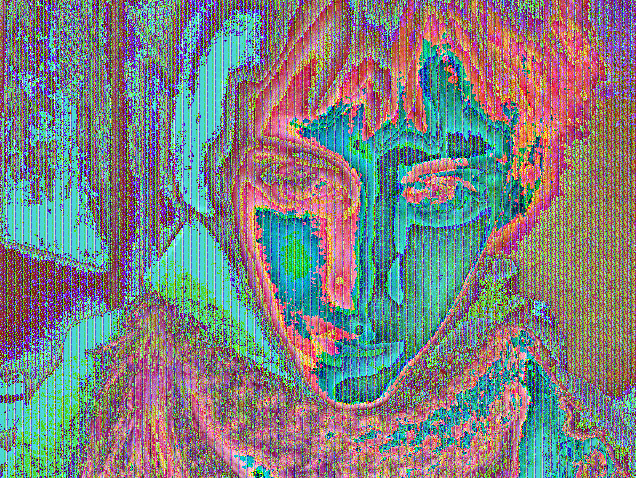
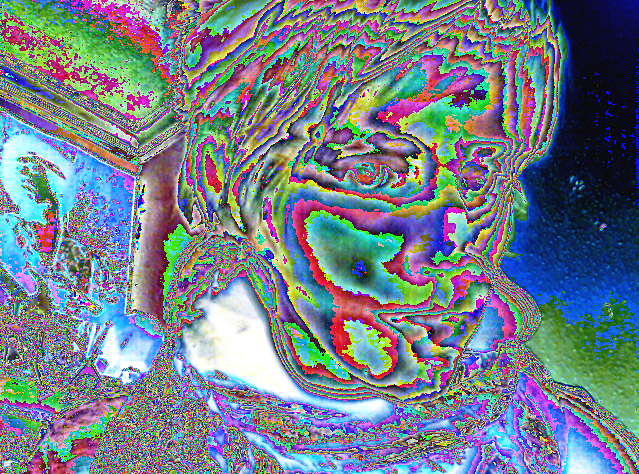
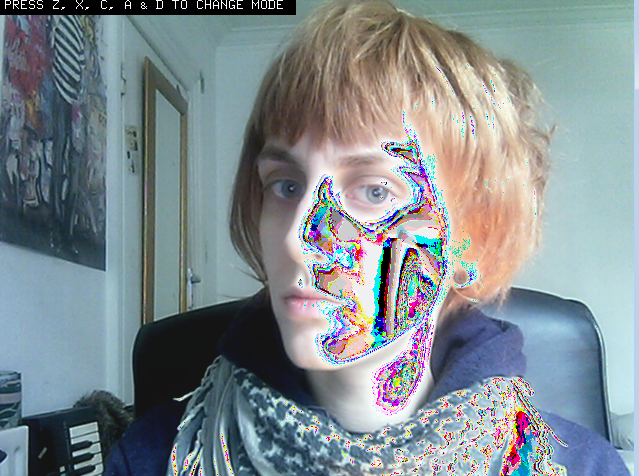
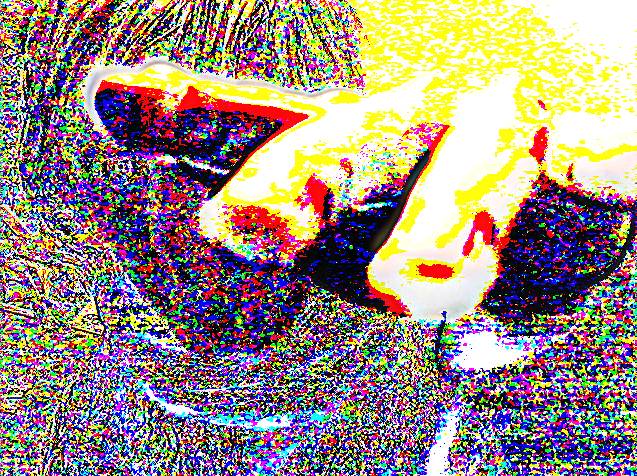

IMAGE PROCESSING:


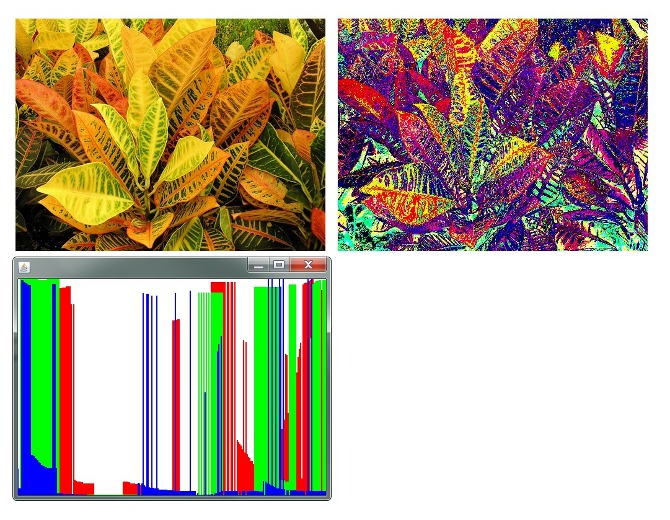
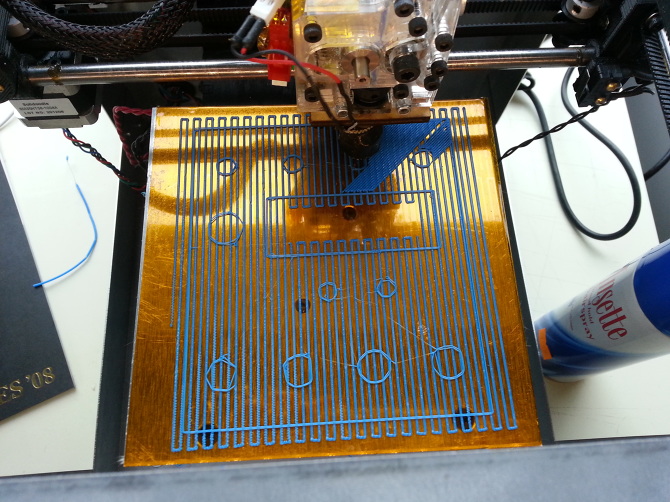
HALFTONE PRINTING VISUALIZATION:


JAVA


Some of the things I've done in Java during my second year at uni:
- an alarm clock
- spellchecker
- password generator with specifications (i.e. one symbol must be capital, there must be one digit, etc.)
- a virtual piano with synths as voices (used hardcoded frequencies and mapped them to the keyboard, not midi notes).
- other stuff with even programming and GUI


C++


For the second year project at uni me and my group chose to make a VST synthesyzer in C++. My part in the project was user interface (design and implementation) and market research. The development of user interface went through several stages:
- low fidelity prototypes were made depicting minimum functionality:


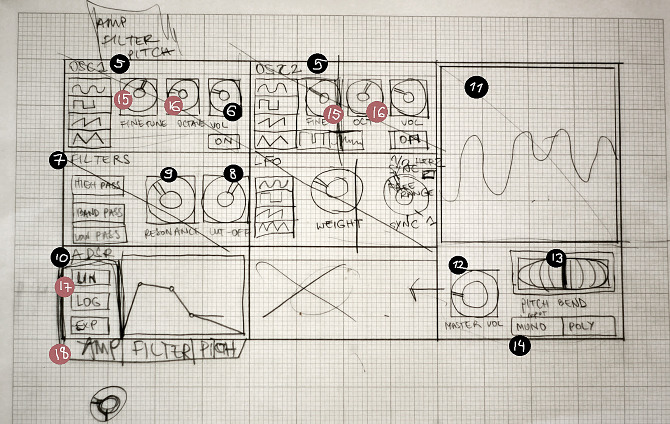
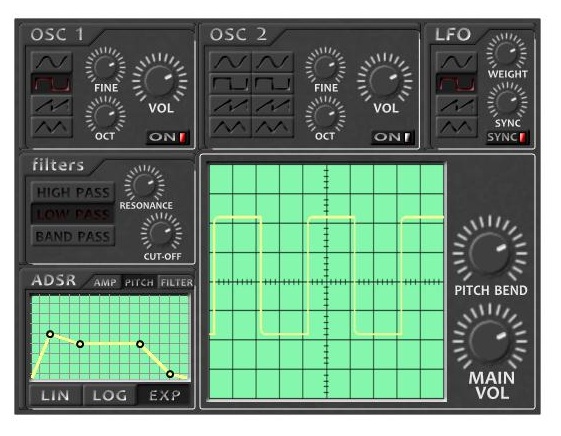
- after we conducted user research and looked at other synthesizers similar to our me and my course-mate made a high fidelity GUI prototype:


- then we integrated the interface in the code of our synth and made it work.

While working on this project I gained valuable knowledge on VST's, sound synthesis and programming in C++.


OTHER STUFF


Hope:
One of the programming languages taught at uni was a functioning language called hope. Even though it is not used anywhere outside education it was a great introduction to core principles of programming and I did very well on the assignment. For example we had to write an algorithm for checking weather one list was a permutation of another:

removeHead: alpha # list alpha -> list alpha;
removeHead(x, []) <= [];
removeHead(x, y::[]) <= if x=y then []
else [y];

removeHead(x, m::n) <= if x = m
then n
else m::removeHead(x, n);

remove: list alpha # list alpha -> bool;
remove([], []) <= true;
remove([x], []) <= false;
remove([], [x]) <= false;
remove(x::[], y::[]) <= x=y;
remove(x::y, m::n) <= remove(y, removeHead(x, m::n));


isPermutation: list alpha # list alpha -> bool;
isPermutation(m::[], x::[]) <= m=x;
isPermutation(m::n, x::[]) <= false;
isPermutation(m::[], x::y) <= false;
isPermutation(m::n, x::y) <= remove(m::n, x::y);

isPermutation(['a', 'b', 'c'], ['b', 'a', 'c']);


THIRD YEAR AT UNI


Advanced Audio Visual Computing:
My projects for this course can be found here: Advanced AV coursework. All of them are done in C++ using OpenFrameworks.
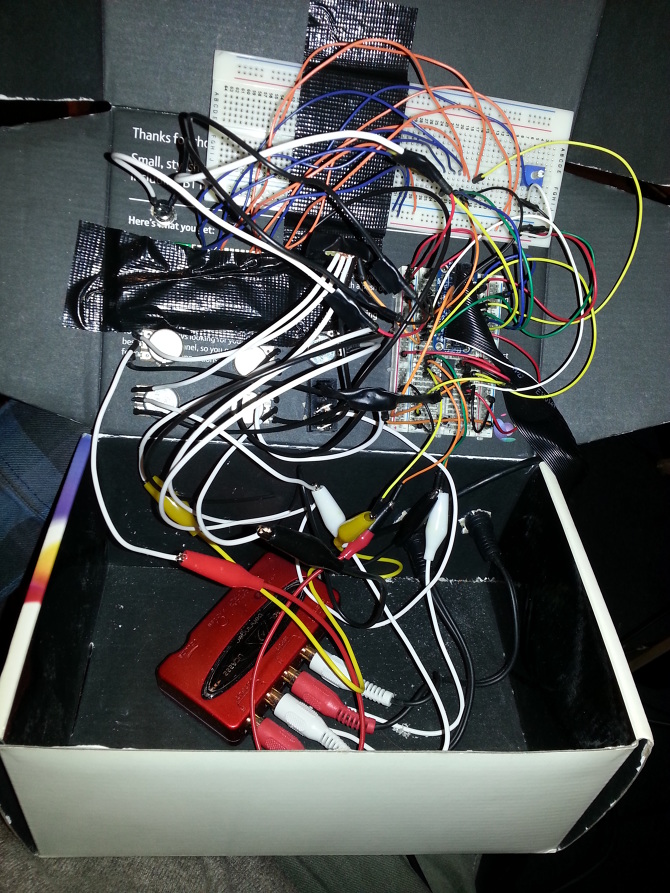
Physical Conputing:
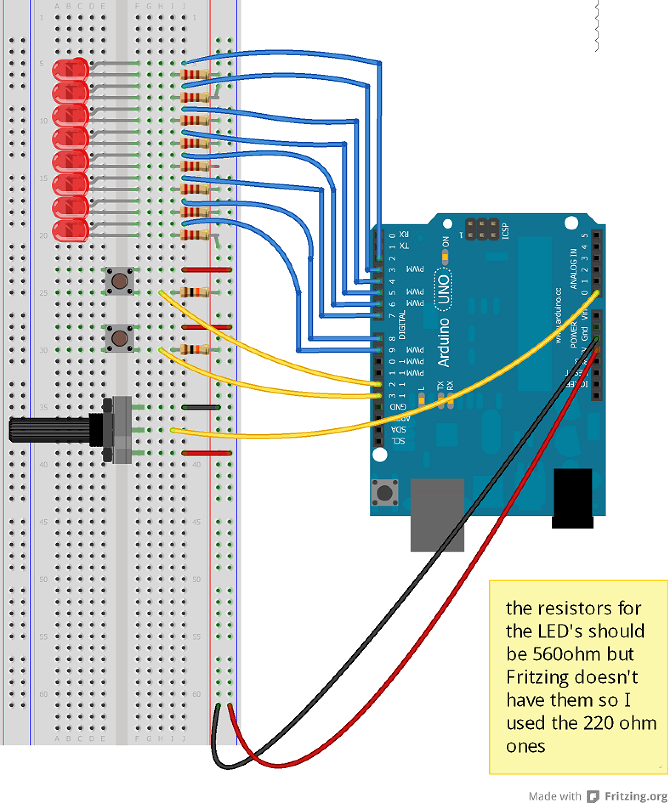
Morphophone 2 is a system that takes audio input via a Max patch, analyses it and represents it in the scope of the sounds that it can make using Arduino. There are two inputs – amplitude and frequency of the sound. Using external libraries Max analyzes the input sound from the microphone and distinguishes the two input values. Max patch is set up so it only registers sound over a certain amplitude thus getting rid of quiet background noise. When the amlitude of the input signal goes over our determined threshold Max sends serial data in a for of a byte (value between 0 and 255) to Arduino. Arduino checks if the Serial data is available every loop and if it is it represents the data (sound) via analog sound.
Morphophone 2

At the moment this is a standalone app written in C++. It takes webcam input and applies 5 video effects/filters. Mouse movent on X and Y axis changes different settings for each effect.

I coded a web project for my artist friend Ren Aldridge

This video project is a part of a bigger GIVE US A SMILE LOVE exhibition taking place at the Playhouse Gallery, University of London Union 9 - 17 November 2013.

Upload page:
link


Main page:
link
Image representation through terrain of shapes.

I am in a process of making a programmable Raspberry Pi pedal that would accept Pure Data patches as effect definitions. At the moment it is made in a cardboard box (3d printed housing broke), is only semi-functional and the development is on hold because I found out about the Owl Pedal (which is incredibly awesome!).


Sometimes I take out my camera and walk around and take some photos and then let them dust in my hard drive till I'm old.


RETOUCHING

Click on each photo to see original. All photos taken by me.


PLACES


PEOPLE


ABSTRACT

when one looks at things with a pencil or a brush in the hand one hopes for certain deconstruction of the world. So to say - lines, shapes and colors don't unite and separate things into the things we see everyday anymore. One continuous shape can start in the bacground, continue onto some item and dissapear on another. I think the easiest way of seeing the alternative composition of the view is when one squints - then things as the projections of mind's logical units can be abandoned. And the visual world becomes unified in accord to totally different rules.


Academic


LAB ASSIGNMENT 1


Youtube video

1. Requirements:
Besides making the LED's blink in a nice way I want to have some control over the system. So requirements for this project are: using an example code make the LED's blink in an interesting pattern and implement some control mechanisms to turn the pattern on/off and alter the speed.

2. Analysis
HARDWARE:
- Arduino board
- breadboard
- 8 LED''s
- 8 560 Ohm rezistors
- 2 pushbuttons
- 2 10k Ohm resistors
- potentiometer
SOFTWARE:
- Arduino IDE

3. Interactivity Design
INPUTS:
- 2 pushbuttons to turn the LED's on and off
- 1 potentiometer to controll the speed of the algorhithm that makes the LED's blink

OUTPUTS:
- 8 red LED's to display the pattern

4. Notes and Testing
- the pushbuttons don't hold themselves on the breadboard - whenever I push them they stick to my finger or fly off somewhere. I tried bending their legs in various ways and changing locations but they're still not stable.
- the registering of the button states needs to be improved (or distributed more often in various places in the code) because now the stated are only checked every loop() iteration so if the user presses the off button in the middle of the execution of the function inAndOut() the internal variable that stores the state doesn't get updated (unless the user holds down the button long enough so the code finishes execution and starts the loop() over again).
- I am in the middle of implementing a poly-rhythmic blinking of the LED's and haven't yet figured out how to make that efficient with real time button state updates (unless I put them everywhere in the code).


CODE:


/*
LAB NUMBER 1:
I used pieces of code from the Arduino examples that were given, mostly from
the CODE2 example from the Experimenter's Guide for Arduino that was provided
with the Arduino kit:
http://ardx.org/src/circ/CIRC02-code.txt

*/

/////////////////////////////////////////////////////////////////////////////
// GLOBAL VARIABLES
/////////////////////////////////////////////////////////////////////////////

const int ledPins[] = {2,3,4,5,6,7,8,9}; //an array to store the indexes of the LED pins
const int sensorPin = 0; // the index of the potentiometer pin (analog)
int sensorValue = 0; // variable to store the value of the potentiometer
const int inputPin1 = 12; // index of a button pin
const int inputPin2 = 13; // index of a button pin
int buttonState1 = 0; // variable to store the value of the button no. 1
int buttonState2 = 0; // variable to store the value of the button no. 2
boolean ledOn = false; // control variable. One o of the buttons turn this to true, the other to false
int counter = 0;


/////////////////////////////////////////////////////////////////////////////
// SETUP
/////////////////////////////////////////////////////////////////////////////

void setup()
{

//set the pins that the LED's are connected to to OUTPUT
for(int i = 0; i < 8; i++){
pinMode(ledPins[i],OUTPUT);
}

//set the pins that the buttons are connected to to INPUT
pinMode(inputPin1, INPUT);
pinMode(inputPin2, INPUT);

}


/////////////////////////////////////////////////////////////////////////////
// LOOP
/////////////////////////////////////////////////////////////////////////////

void loop()
{
// read the value of the potentiometer and store it in sensorValue
sensorValue = analogRead(sensorPin);

// read the value of the buttons and store it in buttonState1 and buttonState2
buttonState1 = digitalRead(inputPin1);
buttonState2 = digitalRead(inputPin2);

// depending on which button has been pressed set the value of ledOn
if (buttonState1 == LOW) {
ledOn = true;
}
if(buttonState2 == LOW){
ledOn = false;
}

// only make the LED's blink if the on button has been pressed
if(ledOn){
inAndOut(); // the function from CODE2 example to make the LED's blink in a recurring pattern
}
// if the off button has been pressed turn off all of the LED's
else{
for(int i = 0; i <= 7; i++){
digitalWrite(ledPins[i], LOW);
}
}

// if(counter == 100){
// counter = 0;
// }
// else{
// counter++;
// }

}


/////////////////////////////////////////////////////////////////////////////
// OTHER FUNCTIONS
/////////////////////////////////////////////////////////////////////////////

// the light method is not yet completed but it is supposed to make the LED's blink in a polyrhythm
// based by the mod of the counter (that is incremented with each loop itteration) and an individual number for each LED.
void lights(){

if(counter % 5 == 0){
digitalWrite(ledPins[0], HIGH);
}
if(counter % 2 == 0){
digitalWrite(ledPins[1], HIGH);
}
if(counter % 13 == 0){
digitalWrite(ledPins[2], HIGH);
}
if(counter % 7 == 0){
digitalWrite(ledPins[3], HIGH);
}
if(counter % 15 == 0){
digitalWrite(ledPins[4], HIGH);
}
if(counter % 3 == 0){
digitalWrite(ledPins[5], HIGH);
}
if(counter % 6 == 0){
digitalWrite(ledPins[6], HIGH);
}
if(counter % 8 == 0){
digitalWrite(ledPins[7], HIGH);
}


}

// this is the method taken from CODE2
void inAndOut(){
int delayTime = sensorValue; //the time (in milliseconds) to pause between LEDs
//make smaller for quicker switching and larger for slower

//runs the LEDs out from the middle
for(int i = 0; i <= 3; i++){

int offLED = i - 1; //Calculate which LED was turned on last time through
if(i == 0) { //for i = 1 to 7 this is i minus 1 (i.e. if i = 2 we will
offLED = 3; //turn on LED 2 and off LED 1)
} //however if i = 0 we don't want to turn of led -1 (doesn't exist)
//instead we turn off LED 7, (looping around)
int onLED1 = 3 - i; //this is the first LED to go on ie. LED #3 when i = 0 and LED
//#0 when i = 3
int onLED2 = 4 + i; //this is the first LED to go on ie. LED #4 when i = 0 and LED
//#7 when i = 3
int offLED1 = 3 - offLED; //turns off the LED we turned on last time
int offLED2 = 4 + offLED; //turns off the LED we turned on last time

digitalWrite(ledPins[onLED1], HIGH);
digitalWrite(ledPins[onLED2], HIGH);
digitalWrite(ledPins[offLED1], LOW);
digitalWrite(ledPins[offLED2], LOW);
delay(delayTime);
}

//runs the LEDs into the middle
for(int i = 3; i >= 0; i--){

int offLED = i + 1; //Calculate which LED was turned on last time through
if(i == 3) { //for i = 1 to 7 this is i minus 1 (i.e. if i = 2 we will
offLED = 0; //turn on LED 2 and off LED 1)
} //however if i = 0 we don't want to turn of led -1 (doesn't exist)
//instead we turn off LED 7, (looping around)
int onLED1 = 3 - i; //this is the first LED to go on ie. LED #3 when i = 0 and LED
//#0 when i = 3
int onLED2 = 4 + i; //this is the first LED to go on ie. LED #4 when i = 0 and LED
//#7 when i = 3
int offLED1 = 3 - offLED; //turns off the LED we turned on last time
int offLED2 = 4 + offLED; //turns off the LED we turned on last time

digitalWrite(ledPins[onLED1], HIGH);
digitalWrite(ledPins[onLED2], HIGH);
digitalWrite(ledPins[offLED1], LOW);
digitalWrite(ledPins[offLED2], LOW);
delay(delayTime);
}
}


________________________________________